Possible Hazards:
Nails are sharp
Hammers are heavy
Wood can have splinters in it
Metal may take a sharp edge
Scissors are sharp
Project Cost Estimate:
Under $5.00 (likely: $3.00)
Hammering
Folding
Measuring
Tools Required
Hammer
Scissors
Your printer
Ruler
A thick board (wood!)
Finishing nails
A disposable metal baking pan
Paper
Tape
Staples/Stapler
Optional Supplies (really helps!)
Saw (if you get a big board)
20 Minutes max
Reccomended:
Not for little kids due to sharp edges and hammering nails.
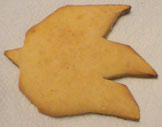
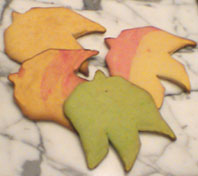
In fact, you can make as many as you want, once you've created the handy cookie cutter in this lesson. Sonic cookies are great any time of the year, and if you decorate them, can even make nice gifts for fellow Sonic fans! The cookie shown here is quite plain on purpose, as it's just an illustration for the shape.
Don't forget! You can also stamp out other things with the cookie cutter, like thin bar-cookies, fondant, clay & more.
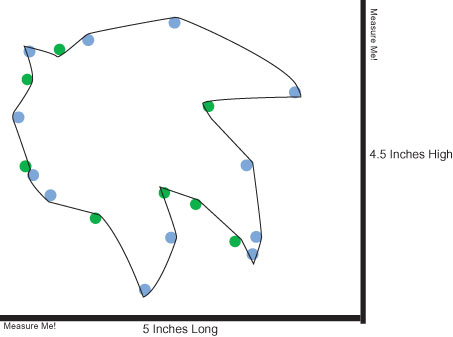
Here's the pattern to get started! You can right click and pick 'save as' to save it, and then print it out. To be sure your printer didn't change its size, you can measure the black bars, and if they match what's written on the pattern, then it is correct.
If it comes out smaller, the cookie cutter will become very difficult to make--so measuring is important.
Boards can be found at home improvement stores. The best board to use for this is *At Least* 1/2 inch thick. This is so that the nail won't go through the other side, and will stand up to pulling. Look over your board carefully before you buy it to make sure the thickness is right for you.
To get a cheap board that's also a decent size, try to find "Cull Lumber" or "Scrap Wood". This is wood other people didn't want. It's left-over from bigger cuts...so it's too small to use in home improvment. This means it's marked down, somewhere usually around .50 cents or under $1.00!
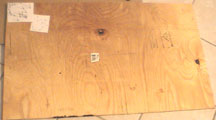
If you own a saw, a big piece is good because you can use it for other projects and still keep your pattern. (you saw off the part that contains the pattern) If you don't have a saw, try to choose a small piece so it won't take up your home. The wood in the photo cost 0.56 cents, see how big it is?
Caution:
Scrap wood can have splinters on its edges. Be careful when you pick it up!

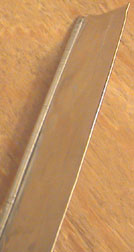
Then, cut the edge off CAREFULLY. Use sharp scissors so cutting is easy, and go all around the bottom until you remove the edge in one big piece (as seen here) Caution: Metal edges will become sharp!
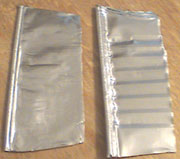
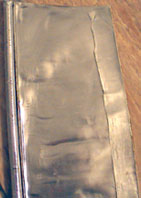
Most pans are ridged/textured (right piece) but, you need smooth (left piece). To smooth the texture, rub the metal with something smooth and hard, like the handle of your scissors or the back of a spoon. Leave the ridge/edge at the top alone, it will become the handle part to your cookie cutter. Once all your pan pieces are smooth like (left piece) you're ready to start folding.
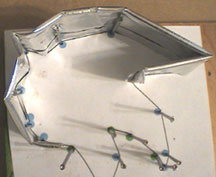
Tape your pattern onto your board (as shown in the photo above, in the upper corner) Then, whenever you see a colored dot on the pattern, hammer a Finishing Nail into it. Try to get the nail in the middle of the dot. Notice that GREEN dots are outside the line, and BLUE dots are inside the line.
Hammering nails may be difficult and noisy. Be sure to hammer outside or on padded surfaces incase the nail goes all the way through the board. It is VERY important that the nails are streight up-and-down, and not put in at angles. Hammer carefully for best results. Hammer each nail only until you can't wiggle it, it is important that the nails be solidly placed into the wood....but still leave most of the nail outside the wood.
A finishing nail (seen left) is ideal. The small head is necisary, as ordinary nail heads will scratch/dent/trap your cookie cutter. A finishing nail is also usually long, plenty of room to hammer it in, and wrap too!
BE SURE:
That the metal follows the path of the BLACK LINE on your pattern. This means some nails will be inside the foil, and some will be outside the foil. The placement of the nails is set up so the metal will stretch-contour between them to make your shape. Rub the metal strip against the nails so it folds/bends against them. One piece of the pan will not be long enough to go over the whole pattern.
Once you have pressed all of the strip around the nails, slide it up and off. Take a new strip and over-lap it by about .5 inch with the shaped piece. Use the stapler to staple them together. (Press hard! Use at least 2 staples for stability) Slide the already-formed piece back onto the nails, and continue with the new strip until you reach all the way back to where you started.
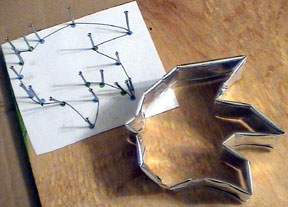
This cookie cutter will NOT be the quality of the ones found in stores. It's pretty sturdy for pressing out shapes, but it is not extremely solid so it can still be crushed/crimped if treated roughly. (still, it's easy to fix) It is metal so you can soak/wash/etc. it once you're done.

As soon as you've made the cookie cutter, it should be washed lightly with soap, and then you're ready to make as many Sonic cookies as you want!